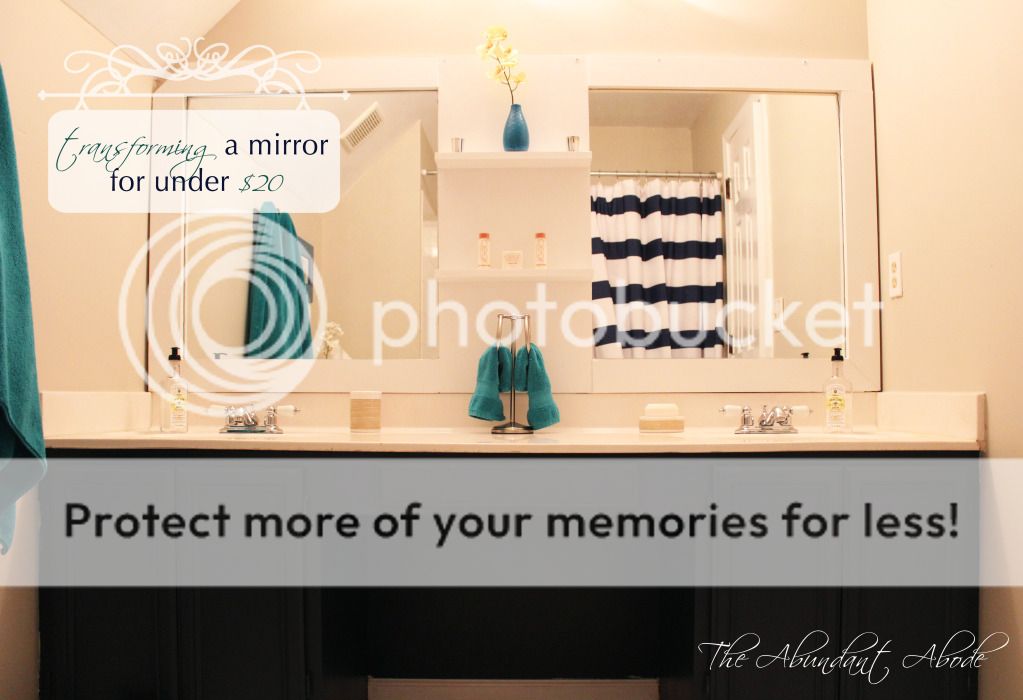
Last week I shared the hall bath nearly complete. It was just missing the mirror frame as I had the need to revise the design...again. But this project is now DONE. Now onto the 1853 more!
 |
| Transforming a Mirror for Under $20 |
I used three 1x4 boards of white oak that were about $3.50 each per 8'-0" long board from Home Depot. For the center panel I used a precut 18"x36" white oak paint grade board that was about $7 from Lowes {again, didn't want to wait in line for a cut}. I took the overall height measurements from the top of the backsplash to the top of the mirror, and then the width measurement of wall to wall and mirror edge to mirror edge. I went 2" taller than the existing mirror in order to attach it to the studs in the wall above. I used my work program, AutoCAD, to draw it up, but you can sketch it. I'm just a sucker for precision...but that fell to the wayside half way through. After cutting each piece I labeled them as they were all very similar in size and difficult to tell apart without measuring. While I wanted to miter each corner, the ceiling on the left side slants inward, and creates a 45 degree angle at the top corner of the mirror.
 |
| Label Boards |
 |
| Liquid Nails and Clamps |
 |
| If you have ever had a crooked screw, or trouble aligning the pilot holes you accurately measured then you probably are not holding your drill level. |
Supply List:
- Wood or MDF for frame, shelves, and back panel (panel shown is 18"x36")
- 2" and 3" wood screws
- Liquid Nails
- Spring Clamps or Angle Clamp
- Caulk
- Paint or Stain
- Level
- Miter Saw (If you're doing the cuts yourself)
- Power Drill
- Brackets if necessary
- Metal French Cleat if desired


This looks like a totally different bathroom! Great job! I hope you will link up with me here:
ReplyDeletehttp://www.thegingerbreadblog.com/2012/07/sweet-saturday-link-party-v49.html
Thanks for the compliment and the invite - just linked up!
DeleteThat is darling. I love the big divide between the sinks.. makes it much more like a "his and hers" vanity. Nice job and great pricetag!
ReplyDeleteThanks! I just hate those big blank mirror walls, and this turned out pretty good for that price!
DeleteWell, how lovely! Well done. Thank you for sharing. Visiting from DIY Showoff. Would love it if you would share this at my Make it Pretty Monday party at The Dedicated House. http://thededicatedhouse.blogspot.com/2012/07/make-it-pretty-monday-week-8.html Hope to see you at the bash! Toodles, Kathryn @TheDedicatedHouse
ReplyDeleteThank you, Kathryn. Just linked up :) Thx!
Delete