Well I suppose it has been a while...
I have been swamped at my day job, but I also have been busy starting and partially completing 78 different projects. Maybe not 78, more like 7 to 8. I have determined there is a really good chance I have adult ADD. No joke, folks. I once had no problem focusing and knocking out a project, but not so anymore.
Example. Friday when Boone left for the UT game he found my recently ordered fabric had just been delivered. While I was annoyed that the 48 hours to ship an order promise turned into 96 hours, all frustration subsided when I began unrolling my 9 yards of master bedroom drapery fabric. I previously settled on some prefabricated panels from Ikea thinking I would never be satisfied with any fabric at a reasonable price point. First I fell in love with Schumacher's Bellows. Which depending on where you purchase it will run you between $80-$120 a yard...times the 9 yards I need...NOT HAPPENING. So then I fell in love with a much more reasonably priced fabric from a local store for $33 a yard. However, I still was not feeling the $300 alone for drapery fabric.
I have had a crush on Premier Prints Chipper Storm for a while, and decided I could be happy with that. And now the Ikea curtains are now in my office. Now for some fun pillows. Also from Premier Prints, I chose Lulu Twill in Storm/Yellow. I am actually not doing the ever popular gray and yellow theme; I'm doing the color scheme I've had in my room for over 5 years - gray, black, various shades of purple, and a forever alternating accent color. First the accent was green, then magenta, now it's going to be yellow. There is a fairly good chance this color concept will continue for many years to come. Hey, I love purple. {FYI: so does John Portman, so I'm in good company.}

Showing posts with label DIY. Show all posts
Showing posts with label DIY. Show all posts
Sunday, September 2, 2012

Saturday, August 4, 2012
Sunday In Suburbia: The {New} Dining Room Chandy
So, I'm about half done with 5 other projects...I really need to focus in on something, but it's juggling 10 minutes of free time here and there, so it's hard to make real progress.
I knew updating the dining room chandelier would be at the top of the list before we even bought the house. It was just not my taste. I like oil-rubbed bronze in some places, but it was not going to work with my formal dining room concept. Of course buying new would be the easy solution, but I have other more important things to spend $250 on. Enter spray paint project 1 of 423.

A few coats of white glossy spray paint along with removing the horrid mauve toned glass shades made quite the difference. Long term I would love Edison lamps in this fixutre, but the ones I want are $9 each. $9x5=$45, and I'm not spending that just on 5 light bulbs right now. Plus, the candelabra lamps are growing on me.

I knew updating the dining room chandelier would be at the top of the list before we even bought the house. It was just not my taste. I like oil-rubbed bronze in some places, but it was not going to work with my formal dining room concept. Of course buying new would be the easy solution, but I have other more important things to spend $250 on. Enter spray paint project 1 of 423.
A few coats of white glossy spray paint along with removing the horrid mauve toned glass shades made quite the difference. Long term I would love Edison lamps in this fixutre, but the ones I want are $9 each. $9x5=$45, and I'm not spending that just on 5 light bulbs right now. Plus, the candelabra lamps are growing on me.
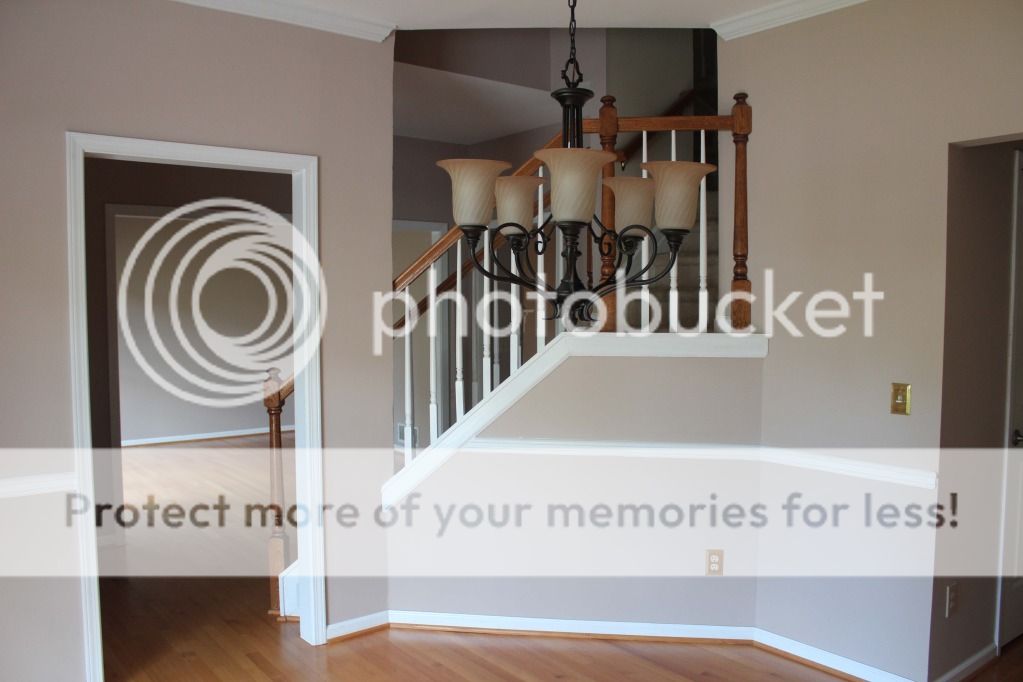
Here is the dining room before we moved in:
 |
| Dining Room Before |
 |
| Dining Room Before: View From Stairs |
We are not done, but it may be a while before I spend the money on a buffet and new upholstered chairs. But here's the "progress". It's funny to me that I was the most unsure about the paint color here, and everyone that has come to my house has loved this color. I'm really happy with it, too! It's about 80% Sherwin Williams "Interesting Aqua" and 20% Martha Stewart "Flagstone" reduced to 50% intensity. I am still contemplating painting the oak banister and railing to white. I know the look would be right, but paint does not typically hold up as well as stain, and the railing gets all the abuse! If you can notice - I painted the wall mounted railing half way up the stairs. Like about 5 other things around the house, I'm going to live with it a little while and see what I think before proceeding.
 |
| Dining Room Progress |
 |
| Dining Room Progress: View From Stairs |
Sunday, July 29, 2012
Sunday in Suburbia: Transforming a Mirror for Under 20 Bucks
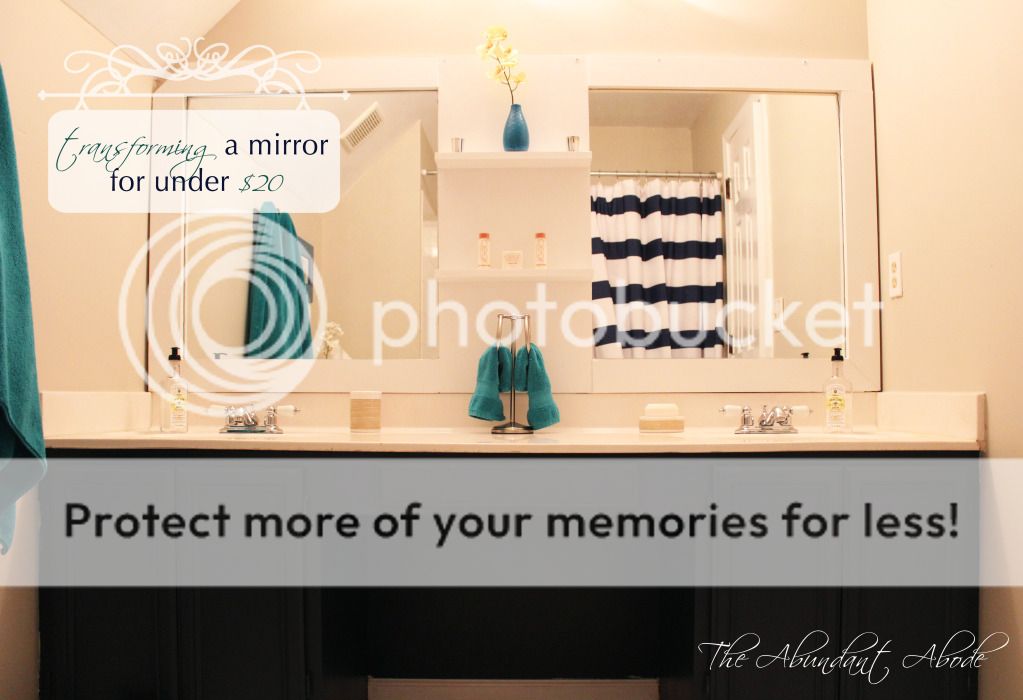
Last week I shared the hall bath nearly complete. It was just missing the mirror frame as I had the need to revise the design...again. But this project is now DONE. Now onto the 1853 more!
 |
| Transforming a Mirror for Under $20 |

I used three 1x4 boards of white oak that were about $3.50 each per 8'-0" long board from Home Depot. For the center panel I used a precut 18"x36" white oak paint grade board that was about $7 from Lowes {again, didn't want to wait in line for a cut}. I took the overall height measurements from the top of the backsplash to the top of the mirror, and then the width measurement of wall to wall and mirror edge to mirror edge. I went 2" taller than the existing mirror in order to attach it to the studs in the wall above. I used my work program, AutoCAD, to draw it up, but you can sketch it. I'm just a sucker for precision...but that fell to the wayside half way through. After cutting each piece I labeled them as they were all very similar in size and difficult to tell apart without measuring. While I wanted to miter each corner, the ceiling on the left side slants inward, and creates a 45 degree angle at the top corner of the mirror.
 |
| Label Boards |
 |
| Liquid Nails and Clamps |
 |
| If you have ever had a crooked screw, or trouble aligning the pilot holes you accurately measured then you probably are not holding your drill level. |

Supply List:
- Wood or MDF for frame, shelves, and back panel (panel shown is 18"x36")
- 2" and 3" wood screws
- Liquid Nails
- Spring Clamps or Angle Clamp
- Caulk
- Paint or Stain
- Level
- Miter Saw (If you're doing the cuts yourself)
- Power Drill
- Brackets if necessary
- Metal French Cleat if desired


Link Parties to Check Out:


Subscribe to:
Posts (Atom)