
It is so close, but we have done a few other things this weekend like drive to Knoxville to pick up our huge new grill from my in-laws. This thing is massive, and unfortunately it is ORANGE with a huge white T. We assembled it Sunday - hope to use it this week - and it seems pretty ah-mazing. {Other than the Tennessee Vol part). But I feel like I'm stringing you along, so I'll go ahead and post the nearly complete bathroom :)
 |
| The Almost Complete Hall Bath |

Feel free to review the before and the progress updates: Hall Bath Reno Progress but for a quick look at the before here you go:

As I said last week, I came to the point in the below photo and decided the mirror wasn't going to work.
 |
| Pre-shelf and Mirror Frame |
My long term plan was to rip off that monstrosity and go with two smaller mirrors with two glass shelves in between. However, we aren't willing to spend the $150 for that quite yet {and now I'm satisfied that we don't need to in the future either}. Instead I decided to spend about $18 for some wood to create a frame and a center back panel with shelves. Obviously I have not installed the frame yet - may have spent a few days redesigning and re-configuring the best way to install. That angled wall/ceiling is giving me some issues, but I've figured it out...maybe...I told my husband that the past three designs I sketched out...hmm a designer redesigning...that never happens.
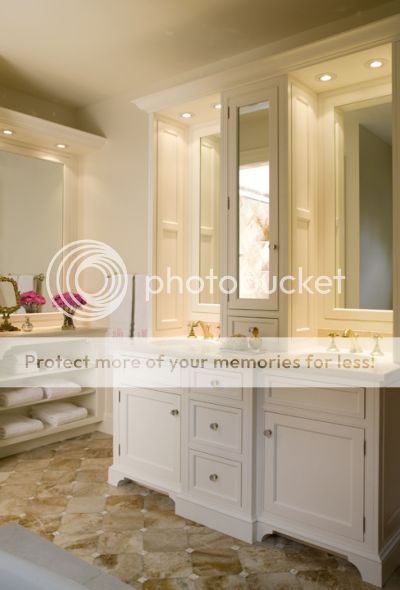
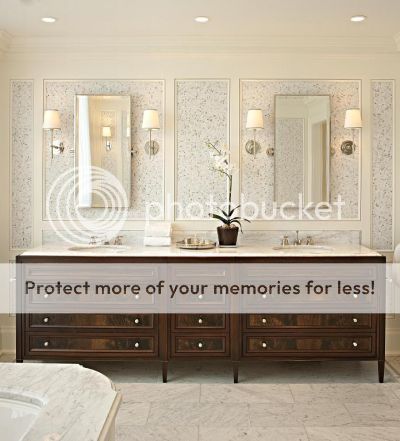
There are a ton of great images on Pinterest and other blogs with big built-out shelving in the center with lovely moulding and detailing.
 |
| Source: Elle Decor - Spitz Miller |
 |
| Source: Elle Decor - Lisa Tweed Interiors |
 |
| Source: Elle Decor - McGill Design Group |
Well the last one doesn't have the storage in the middle - but imagine it with me - floating glass shelves in that centered tile portion - ahh lovely. Wonderful ideas for our master bath, but I wanted something super simplistic yet still functional for the hall bath. After all, it's going to be the kids bathroom eventually. Whenever those kids I keep mentioning decide to show up. I decided to take some loose inspiration from a renovation I did a couple years ago...which I can't find the bath photos for...but if you are ever in Niagara Falls then stay at the Radisson Fallsview and take a look at their bathroom mirror :)
 |
| Breaking up a Large Bath Mirror with Shelves |

 |
| Center Shelf with Additional Framing to Come... |
 |
| Painted Cabinets: Martha Stewart Wrought Iron in Satin Finish |
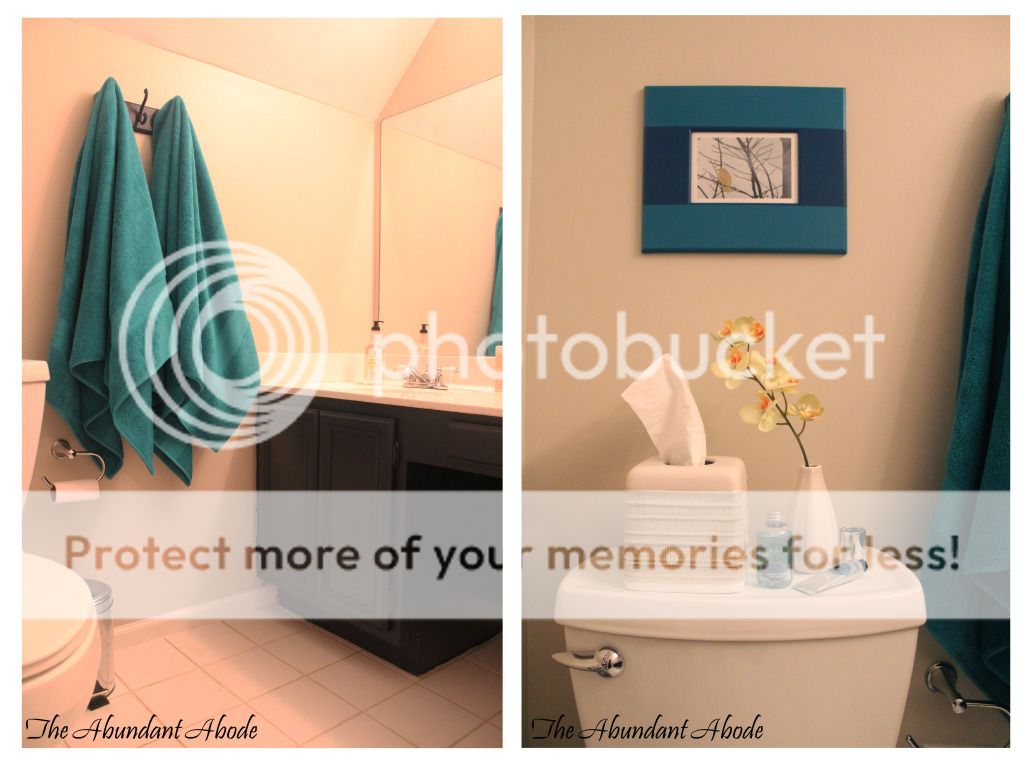
- New Towels: $25 from TJ Maxx
- New Tabletop Towel Ring: $8 TJ Maxx
- New Shower Curtain: $20 Target
- "Linen Look" Bath Accessories: Bed Bath & Beyond, Already Owned
- Towel Hook: Already Owned, repainted to match cabinets
- Existing Cabinets: Repainted for @ $5 using Martha Stewart Wrought Iron - Satin Finish
- Paint for Ceiling: @ $13 - ceiling took HALF A GALLON - OMG
- Paint for Wall Sherwin Williams Accessible Beige Eggshell Finish: @$10
- Paint for Trim and New Mirror Frame and Shelf: half gallon left by previous owner
- Three 1x4x8' White Oak for frame (TB installed) and shelves: $3.50 ea = $10.50
- White Oak Back Panel: $7 (Originally thought just MDF for less $, but changed my mind)
- Hardware for Cabinets: TBD - I haven't found what I want yet...I've budgeted $15.
- Picture Frame above Toilet: $1.99 clearance at Michaels - I added the teal stripes
- Trash Can: $10 Target
- Vases and flowers: Ikea, Already Owned
- Little silver votives: Target, Already Owned
- Still Need a Bath Mat at the Shower: Maybe $10
I did not put a specific budget on this project. It was more of a - "how cheap can I do this?" type thing. For under $150 I feel pretty good. Of course under $50 would have been more awesome, but then I would have reused my boring ivory towels and boring ivory shower curtain and the existing boring wall mounted towel ring, and probably lost the shelf and frame. And that is...well, boring.
Once I add the frame I'll do a mini-tutorial on the whole frame+shelf process and include the right way to install it {like I would detail for a hotel} which I did not do. Oh yipee!

No comments:
Post a Comment