Friday, November 8, 2013

Revealing the Nursery

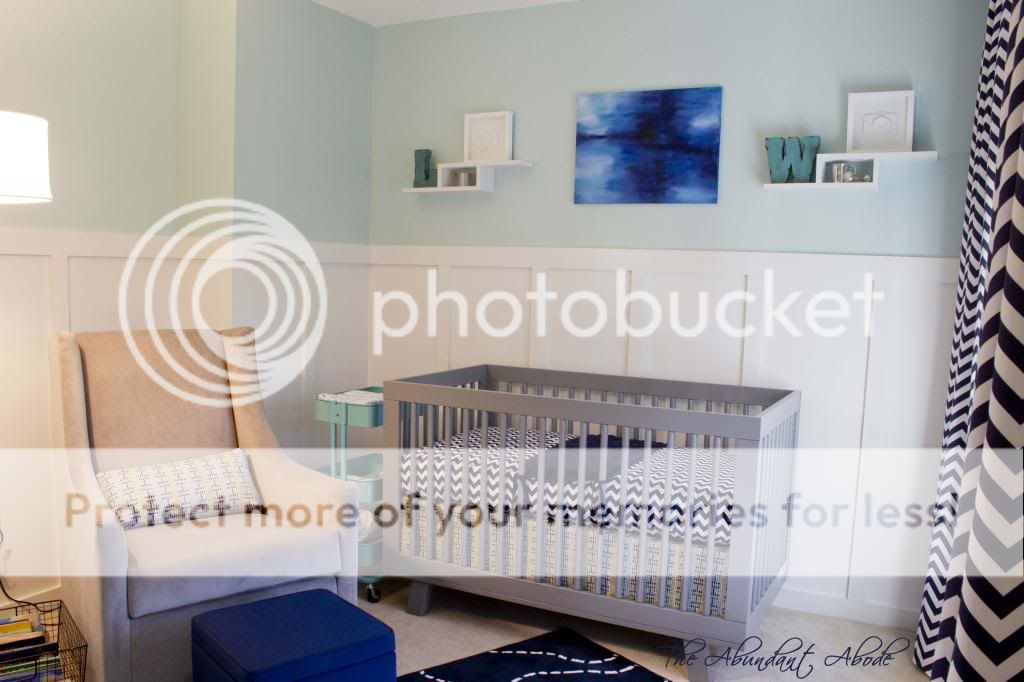
It is finally done!  Our little one will be here December 10th, and his room is all ready for him.  His mother and father on the other hand...not so sure.
 
Compared to the empty dingy room that was there when we moved into the house the nursery is now bright, colorful, and simply modern.  {And compared to when we moved in my belly is 15" larger...hello baby.}
 
 
As you know I'm not one for over accessorizing...sure it looks great in a magazine photo, but not practical for my life. I have better things to do than spend hours dusting a bunch of little items!  The wall shelves provide just enough stylizing for me.  I also liked being able to reuse those which have been sitting in a closet since we moved.  (From Target back in 2006 - used in my college exit show!)
 
 
The little silver items on the shelves are from my mother-in-law.  On the L shelf is a little silver cup she had engraved when my husband was born with his name and birthday.  On the W shelf is a matching pewter cup she had engraved with L-Dubs first name as well as a pewter rattle. 
 
 
The glider and the crib are my favorite purchases.  I decided not to compromise on what I wanted for those two items.  The glider is West Elm and the crib is Babyletto, but I purchased locally at New Baby Products since they had it in stock, and it's always good to support local business!  I love my little aqua rolling cart by the crib and glider.  Perfect for stashing extra swaddle blankets and burp cloths as well as the sound machine and monitor.  
 
 
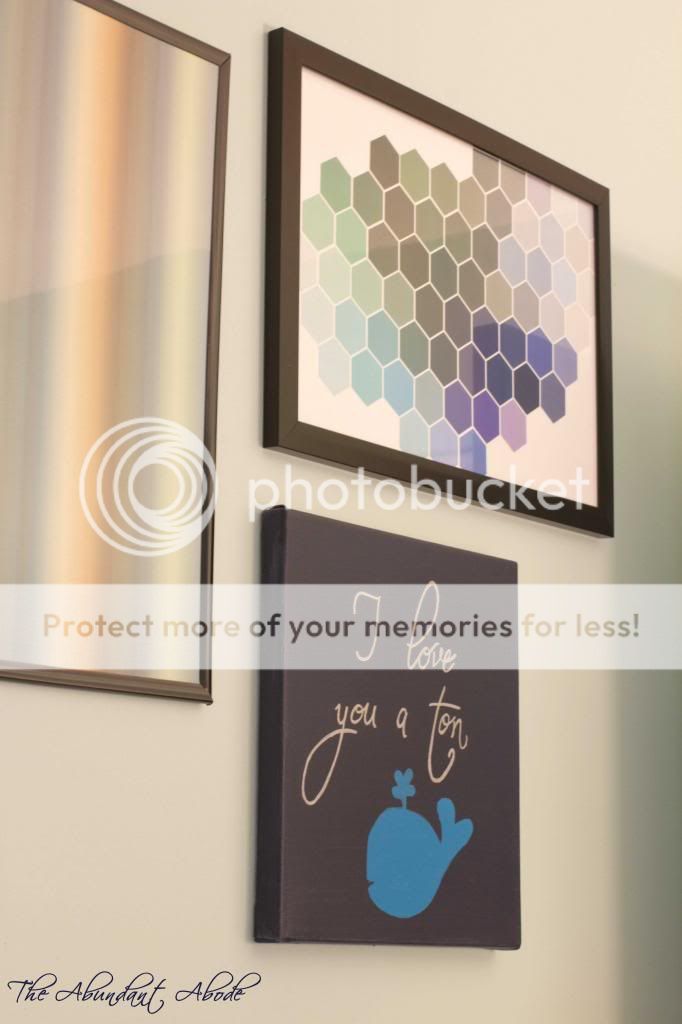
The art wall is the bane of my existance...okay not really.  I just cannot ever be happy with these type of projects because I know what I really wanted, but could not justify spending over $400 for it all.  So...other than the vintage camera sculpture art it is all DIY...the center one is actually a wallcovering strike-off from work...The art above the crib was also DIY.  Another truly devastating compromise was the dresser.  Well maybe not devastating, but certainly annoying.  It is super hard to find dressers between 50-58" wide!  All the ones I loved were over 60" and that wouldn't fit between the bedroom door and the closet door...I thought my life was over.  Perhaps that was the hormones...  


For some of the other items:


Crib Skirt & Glider Pillow DIY - Info to Come
 
 
Now all the nursery needs is the baby!!  


Friday, October 18, 2013

DIY Blackout Lined Drapery Panels

Hooray for Friday!  As I'm approaching 33 weeks preggo on Sunday the overwhelming exhaustion has certainly found a way into my everyday life.  (As in I thought I posted this last Friday and JUST realized I did not!)  I could seriously do nap time everyday, but there is no time for that!  Maybe I'll give in to that in a couple more weeks...I've been told I should get my sleep now since I won't EVER SLEEP AGAIN....well that's an exaggeration.  Eventually, maybe...when he is grown up, out of the house and married I may be able to sleep again.

On to other things like an almost completed nursery!  A few weeks ago you had a sneak peak at the window treatments with the non-DIY roman shades.  Initially I was going to have custom ones made, but I realized Pottery Barn sold ones very similar to what I wanted for only $148 per window.  I couldn't pass that up.  I considered only having these shades as the window treatment; I love the simplicity of it.  However, given my window condition there is a lot of light leak along the sides of the window.  I opted to add drapery panels to the side.  There is a lot of talk about not having full length drapery panels in nurseries, but I will hope for the best.  If this child is like his father then we probably won't have a problem with him swinging from the drapery...if he is like me...well that could be an issue.  50-50 shot, right?
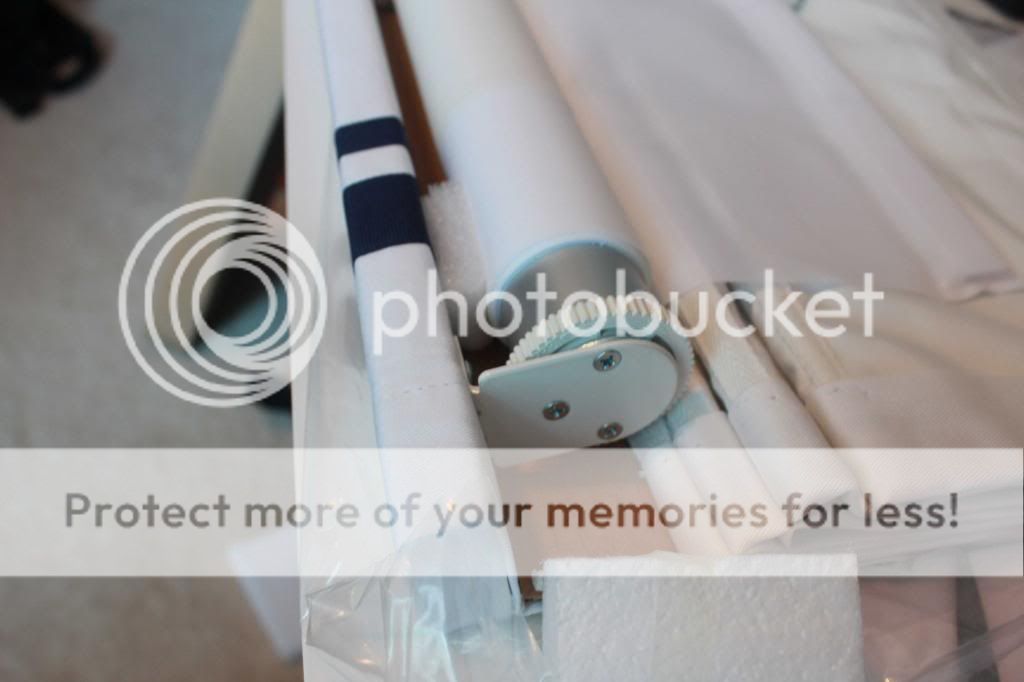
Underside of Pottery Barn Roman Shade Showing Mechanism

Why stop at just a drapery panel?  I though I should go ahead and make it a blackout lined drapery panel...really should have done this project before my belly expanded 12".  I could have done this as a video DIY and provided everyone with a laugh as I attempted to crawl around on the floor to lay this out and iron over the hems.  This also would have been good to do before furniture went into the nursery since that was the only empty room with tons of floor space to lay out the fabric; while this is a relatively easy project it is a lot of fabric to deal with! 

First you will want to have a space (the floor or a very large table) that you can lay out the fabric.  My drapery fabric is from Premier Prints, so the 54" fabric is actually 55" wide edge to edge. The blackout fabric is from Hobby Lobby and is 53" wide which gave the perfect 1" overlap on each side.  After ironing the chevron fabric and cutting the length I needed I laid it face down on the floor.  I determined the length by ceiling height + 2" double turned bottom hem + 1" double fold top hem + 5" double fold top for drapery pole pocket.
Fabric face down plus blackout lining face up

A double fold hem is when you simply fold over the fabric and stitch.  A double turned hem is when you fold over the fabric and then fold it over once more, so you are folding then "turning."  They really should have come up with better lingo for all that!
Stitch Witch in lieu of pinning
Several months ago I did similar sized panels for our master bedroom that were not blackout lined.  It is much easier to lay out the fabric, iron over the hem and then go sew the hem when you are not worried about keeping the lining fabric in place.  Sure a "professional" would pin it in place, but that is a lot of pins poking out everywhere...and this fabric has a white background...and I am a bit of a klutz...so it seemed like a bad idea.  Light bulb moment!  I'll just use a few strips of stitch witch (or whatever brand you like) to hold it all in place for me to sew the hems. 
Iron all your hems in place; use 4-6" strip of stitch witch every 12-24"
 
Double Fold Hem Along Sides

At the top of the drapery I cut back the blackout on the portion I will fold over to create the pocket for the pole - no sense in having the extra weight.  Slight warning: given the thickness and weight of the completed panel the pocket style may not have been the best idea...certainly the easiest, but it does not hang as effortlessly as I would like.  I plan to go back and either add grommets or "button holes" to attach drapery hooks...once I don't have this belly in the way!
Top of Drapery Panel
The top is a multistep process.  First I did the same double fold method as the sides and sewed that hem in place along with the other two sides and bottom.  Then I double checked my length by measuring the distance from the floor to the mounted drapery pole in order to determine how much I needed to fold over the top for the pocket.  Once I determined that distance I ironed that fold and did a quick stitch across.  If you are a more experience seamstress then you would do a blind stitch, but I'm not that experienced!  A blind stitch is barely noticeable on the finished side of the drapery as it just slightly grabs the fabric rather than the needle going all the way through the fabric and back to the other side.
Pole Pocket
Next week I should have all the artwork up and I can reveal the COMPLETED NURSERY! 


Friday, October 4, 2013

Electrical Outlets and Switches Perfect for Kids Rooms


Our 1991 house is covered in almond outlets and pole switches.  We replaced just the switch plate covers when we moved in because the almond is so dingy looking.  For the nursery I wanted an illuminated switch, and also placed one of these in our hallway at the top of the stairs. It's nice not to have to feel around in the dark for that switch. {Especially the one at the top of our stairs - I've come close to stepping a bit too far before!}

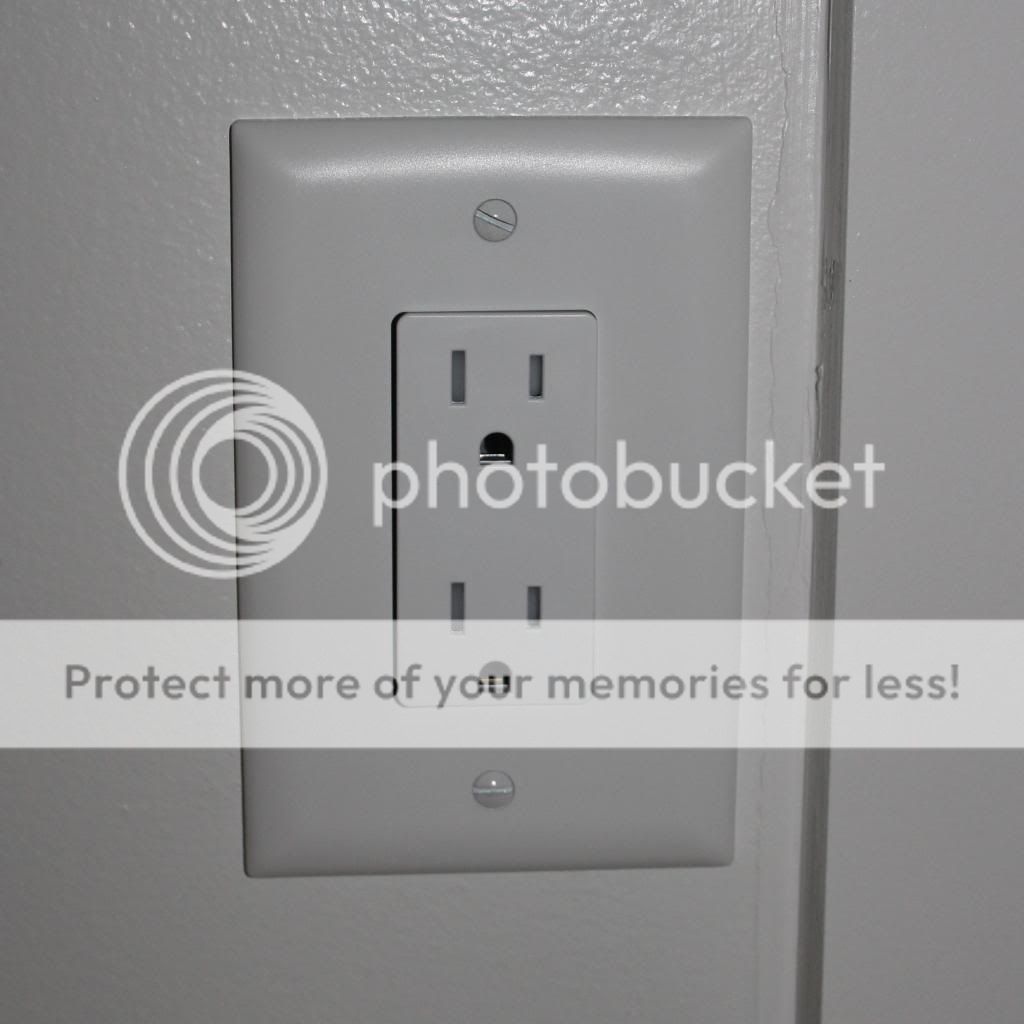
Tamper Resistant Outlet

The other item we updated from 1990's almond are the duplex outlets.  We used these handy duplex wallplates in other areas of the house when we first moved. Eventually we will replace all our duplexes that are in "kid areas," but for now we focused on the nursery as the practice round. Rather than using those little plastic inserts to protect L-Dubs from electricuting himself, we installed tamper-resistant outlets. The outlets come in a 10-pack at Home Depot for $19.99 plus $5.90 for the 10 pack of wall plates. I did the slightly nicer kind because I like the clean look of the flush face. 
 
If you have installed a hardwired light before then you can do both of these updates.  If you have common sense than you can also do this!  {If you stink at following instructions, then please leave electrical up to a professional - don't burn down your house.}

First, turn off the power.  You will need to do this at your breaker box.  Just turning a light switch to off does not mean the power is off; electrical current is still running through the wires.  As additional precaution, use a voltage tester to ensure electricity is not running through the wires before beginning work.


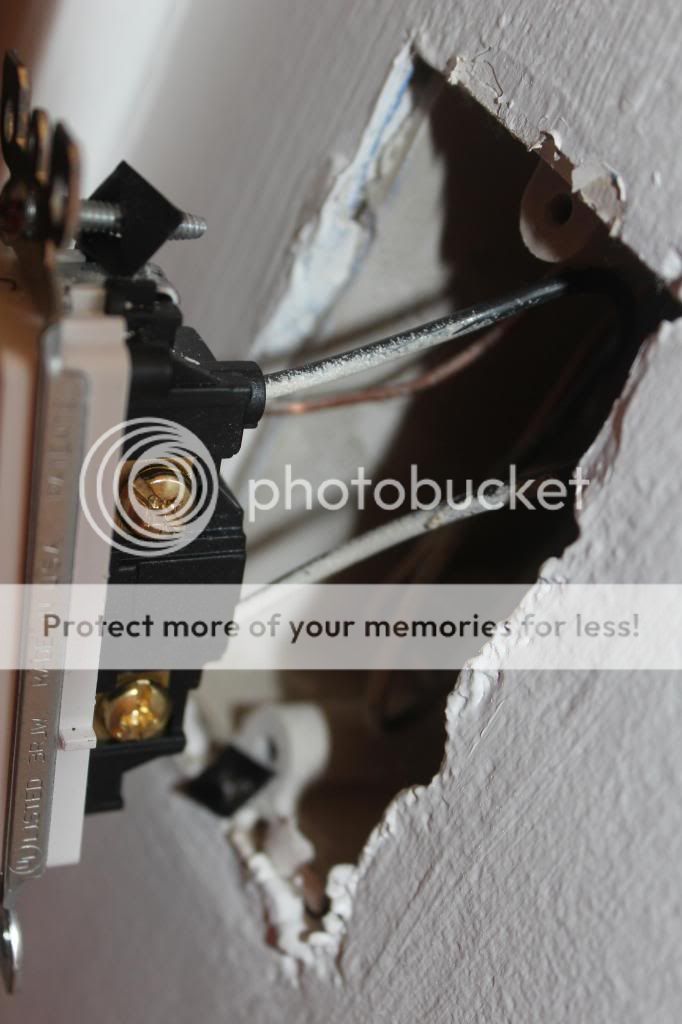
Second, remove the face plate and screws from the oulet you are replacing.  When you pull it from the wall it will look like this:

Old Outlet Hanging from Wall - Oh the Dust
Wires at Light Switch (both are black - they just had paint on them from builder)
Grounding Wire on new Light Switch
A typical duplex will have 5 total wires and a typical light switch will have 3.  The important thing to note is the location of the white and black wires in relation to the finish of the screws for the duplex.  This is intentional.  "Hot" wires {which are usually black, sometimes colored} attach to the brass screws {black to brass).  The "neutral" wires {white} attach to the silver screws.  Our new outlets said on the back plate which went to which side, but it is the most critical thing to know here.  Doing this incorrectly is what will send sparks flying.  In addition to the two white and two black wires is the copper grounding wire which attaches to the green screw {ground to green}.  Also, some outlets may have slightly different wiring if the top or bottom outlet is switch operated.  {If you have a light switch that can operate a lamp plugged into that outlet.}  A typical light switch will just have the two black wires and the copper grounding wire.  There will be more wires if you have a light switch that operates more than one light, and that will require a different switch than what I have shown.

Third, once you have made note of how the existing outlet is attached then you can loosen the screws and pull out the wires.  Many outlets have a little hole to push a pin through to "release" the wire, but it takes a bit of a tug as well.  At least to me it was more of a tug than I expected.

Fourth, attach the wires to your new outlet.  Remember: white to silver, black to brass, copper/ground to green.  Do a gentle tug on the wires to ensure they are securely attached, and then push it all back in your wall, re-screw, and add your cover plate.  My new light switch conveniently labled "top" and "botton" on the unit.  Now you are done, so turn back on your power!

Newly Attached Outlet - See Green and Silver Screws

Installed Oulet and Cover


Friday, September 27, 2013

The Nursery Walls Part II: Board and Batten...kinda

Are you excited to see the finished walls?!  And because I forgot to take a non-camera phone photo previously you will also see a sneak peak of our non-DIY window treatments.  You lucky duck.


I absolutely love the fresh, clean and bright feel of this room now.  Do you remember the before?


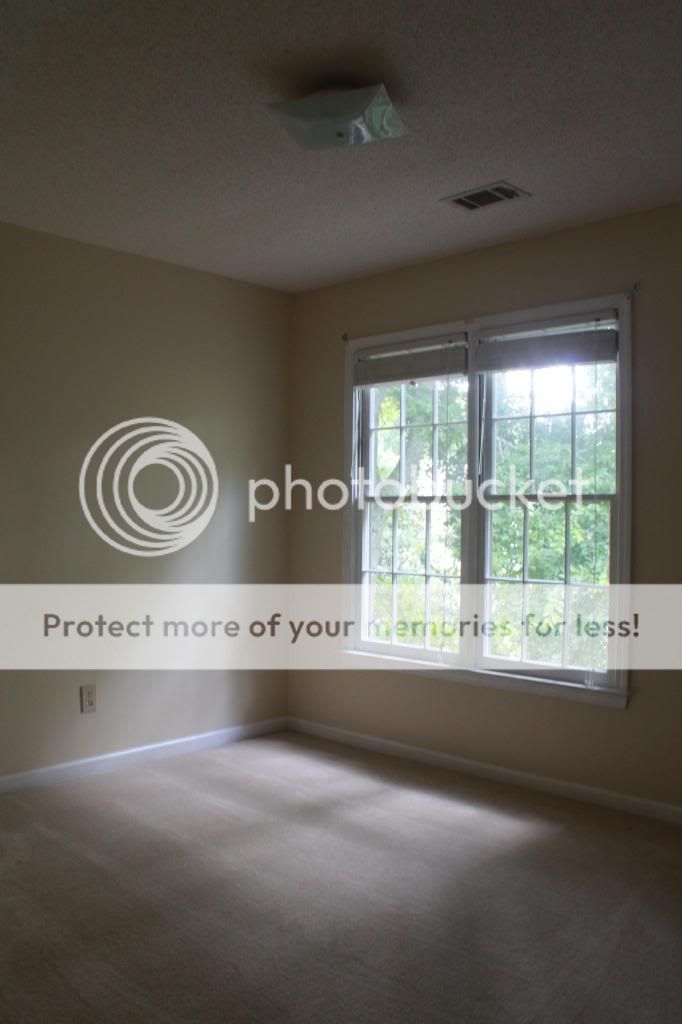
Nursery Before
To start on this you will want to determine how you want your placement and take precise measurements.  Given my day job contains lots of computer aided drawing and detailing I have our whole house (and yard-to-be) drawn up in AutoCAD...that's normal, right?  Therefore I triple checked the nursery dimensions, updated the drawing, and elevated all my walls to aide in my OCD planaholic personality.  A simple sketch would suffice, too...but why would I just do that?  I later decided to delete the crown moulding - with only 8'-0" ceilings it really limited my options for art sizes, shapes and placement.  Trust me - I did about 10 other elevations playing with art and shelving just to be sure.

Elevation Drawings
We made our trip to Lowe's as my research indicated they had the primed MDF boards at the sizes that best suited our space.  We needed eight 1x3x8's for the vertical (which we would cut exactly in half) and six 1x4x12's for the base and chair rail.  For anyone new to lumber dimensions the width and thickness are NOMINAL sizes.  A 1" thick board is generally 3/4" thick (depending on if it is wood, composite, or MDF).  A 3" wide board is actually 2-1/2" wide and a 4" wide board is actually 3-1/2" wide.  Check out more on that at trusty old Wikipedia: Lumber.

I also picked up: Liquid Nails, caulk, and 1-3/4" long primed finishing nails.  Initally I hoped to use our nail gun, but the longest nail it accomodates is 1-1/4."  In our situation we have the 3/4" thick lumber plus 5/8" thick gypsum board which totals 1.375."  A nail that is 1.25" wouldn't even make it into the studs, and that would be useless.  Note: I was stoked about the primed finishing nails.  I didn't use those when we added trim to thicken up our crown moulding downstairs, so I thought they would be the coolest nails ever for this.  Um, no.  After a few taps with a hammer the primed finish came right off 75% of the nails.  {sad face}

Back when I primed and painting the ceiling, I went ahead and primed the walls and used a coat of the cheaper flat finish ceiling paint as my first coat of white paint where I was installing the batten.  As you increase the sheen level in your paint the price increases as well.  Not that a coat of paint is all that costly, but with the set up and clean up process of painting (the paint trays, the rollers, the brushes) it just made it easy to go ahead this way.
Painting Progress

When making my cuts for the base and chair rail I decided not to overcomplicate things.  With the exception of my one outside corner I butted all my joints together.  Why miter if I don't have to?  If you did not see last week's post about removing base board then check that out here: The Nursery Walls Part I.

Outside corner with mitered edge; inside corner straight - overlapping the perpendicular board
First was the base, second the vertical battens, and last the chair rail.  This is a camera phone photo, so it's a little blurry.  Don't fret - the glider was covered in a canvas crop cloth and plastic drop cloth when all the painting occurred!

And I chose neither of those paint colors! Left: SW6218 Tradewind, Right: SW0019 Festoon Aqua
Now ideally you want to hit studs with your nails...and ideally the duplex outlet isn't DIRECTLY  where you want your center batten...ON ALL FOUR WALLS.  Seriously...shut up.  I just pushed the board I wanted to be centered over and slightly respaced the other boards.  I considered just cutting the board at the outlet, but hey...six one way, half a dozen the other.  Whatever floats your boat.  We hit studs with the base and the chair rail, and then about 30% of our vertical boards.  The rest we are trusting in Liquid Nails and the nails that are just through the drywall. 

Once you have completed attaching all your boards you can caulk away.  Follow the instructions on your caulk to determine how long you need to wait before painting (usually 2 hours).  Since the boards and walls were already primed and the walls already had a coat of paint, I only had one full coat of semi-gloss white paint to do plus a little touch up here and there. 

See...this paint color is kinda in between the other two swatches...SW6477 Tidewater

See that annoying outlet placement?  Oh well.  Speaking of electrical...next week we can talk about updating our old almond colored duplexes and light switches to white ones.  And just like our walls were so much more than paint...our electrical updates ARE MORE THAN JUST A COLOR CHANGE!  I know you are on the edge of your seat in anticipation...