
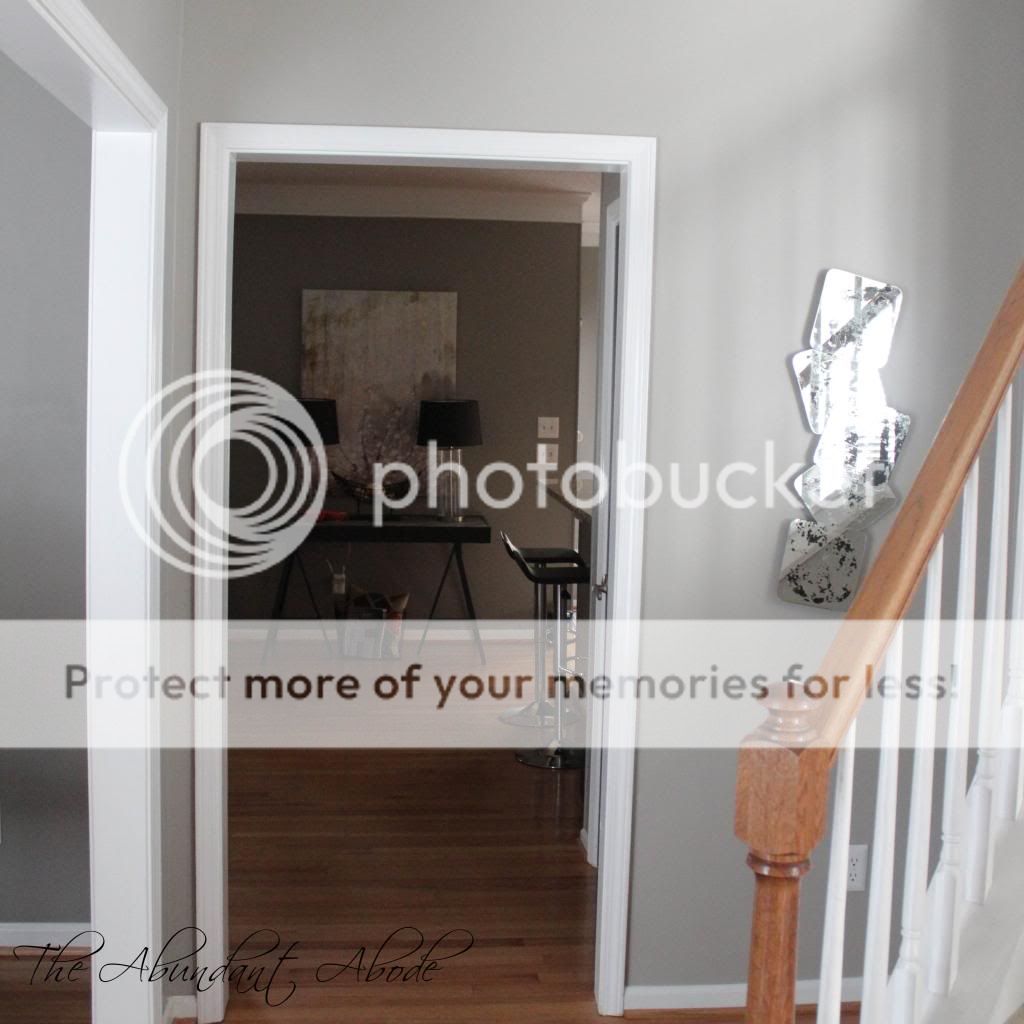
Today we are in the foyer. Our foyer is rather small thanks to our angled staircase, but it creates a little corner perfect for a focal element. My long term plan will include a pedestal with sculpture; however finding a piece of sculpture that evokes the right feeling is not an easy process. Especially when I want to keep it under $150. {Too bad I don't have access to welding equipment anymore or I would do it myself!} So far, everything I find is simply too...pedestrian. {I laugh just saying that; one of the hotel brands I work with says this all the time!} So, I decided on a temporary solution that could be used elsewhere in the house when the permanent solution occurs.
Several weeks ago when searching for accessories on a project I came across this wall sculpture from Phillips Collection.

It's a little rustic for me, but it sparked an idea. Six square mirrors from Ikea no longer had a home when we moved from the apartment...so I was off to Home Depot to purchase muriatic acid to antique those mirrors.
 |
| Setting Up |
- Paint Stripper
- Plastic Putty Knife
- Muriatic Acid
- Water
- Mask, Eye Protection, and Chemical Resistant Gloves (I used one kind for the stripper and the heavy duty kind when handling the acid)
- Spray Bottle for the Muriatic Acid
- Spray Paint - black and gold are the most commonly used
- Paper towel and Cotton Rags
First, you will need to strip the paint off the back of the mirrors using paint stripper.
 |
| Evenly spread the paint stripper on the back of the mirror. |
I am not sure if my paint stripper was old and less potent or if the Ikea mirrors just had a hard core painted back...The first couple mirrors I let the stripper sit for about 30 minutes and they did not turn out well and took a lot of scraping. This is not an ideal situation as you do not want to damage the mirror surface under the paint. Then I decided to let the stripper sit for 8 hours, and it worked great - just gently pushed away the stripped paint. {After doing this I read a different how to article which suggested aerosol paint stripper - perhaps that works better.}
 |
| Left: Stripper after 30 Minutes | Right: Stripper after 8 hours |
Clean up the entire mirror using water and paper towels. It is okay to still have some of the painted back on the mirror - this can help keep you from removing too much of the mirror finish in the next step.
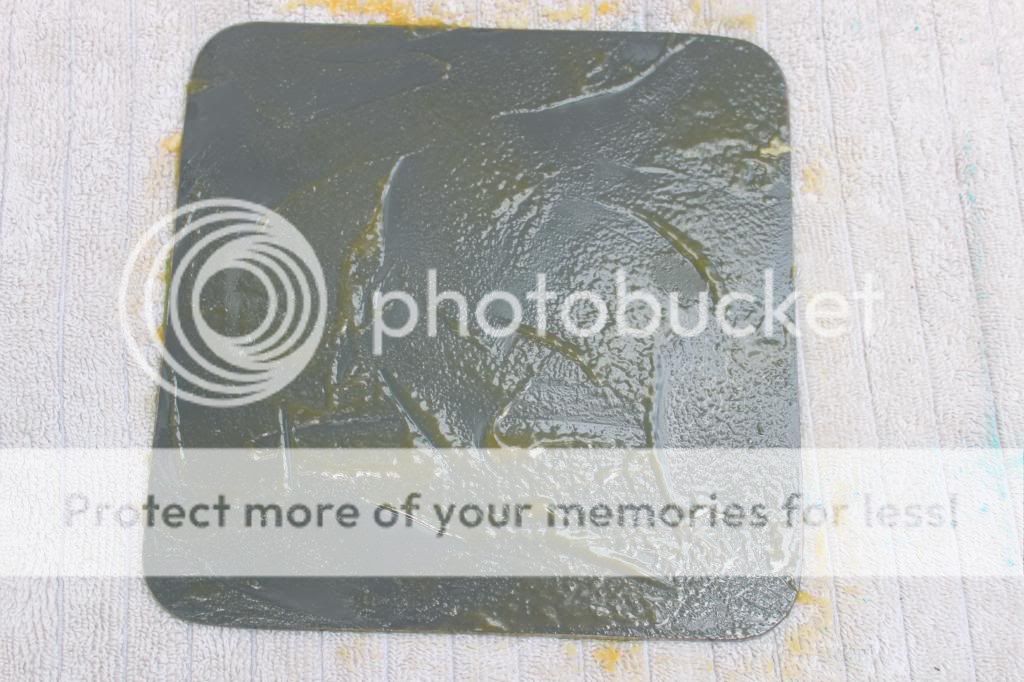
Second, once the surface is dry spray the muriatic acid on the back of the mirror. The more you spray the more "silver" mirror finish will be removed making the mirror completely see through. Only let it sit for about one minute, and then pour on the water. Carefully blot up the water with dry cotton rags. Keep your mask, goggles and gloves on until you have disposed of all the tainted rags and paper towels. Here is the front and back of my favorite one after the muriatic acid process. If you are going for a true "antique mirror" look than aim at the edges of the mirror. This will provide the most realistic end result as true antique mirrors begin the wearing around the edges.
 |
| Left: Back of Mirror | Right: Front of Mirror |
Third, it is time to repaint the back of the mirror. Before painting be sure to thoroughly clean the back side of the mirror - you don't want any residue or fingerprints when you go to spray paint. I have seen black or gold spray paint used for this part; however, I think it would cool to do another color for a different look. {I may do that for another project.}
 |
| Painting Process |
 |
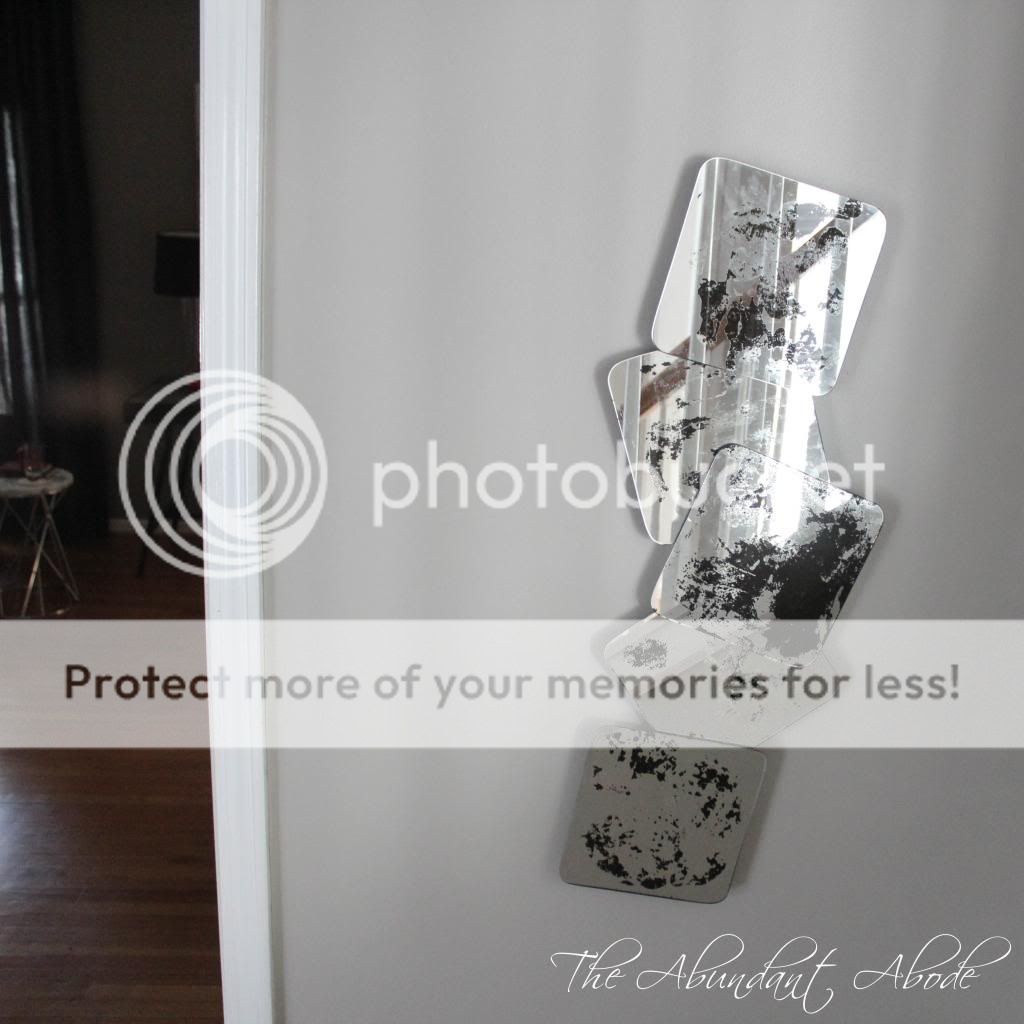
| Completed Mirrors Mounted to Wall |
The one on the left is the same I showed above as my favorite. I was concerned this one would be my least favorite - that I took off too much of the mirror finish, but in the end I love it. I still want my pedestal and sculpture, but for now provides a little more interest from the entry. {And, I know another place for it when I come across that perfect sculptural element!}
Remember, I was not going for a true antique mirror look. I just wanted to "industrialize" those cheap boring mirrors. If you are aiming for a true antique mirror look then I recommend these two tutorials that I reference: Layla Palmer and Kristan Cunningham.


What a great way to give "new life" to those unused mirrors! I like the effect and the way you displayed them!
ReplyDeleteI love the results of your technique! So cool!
ReplyDelete